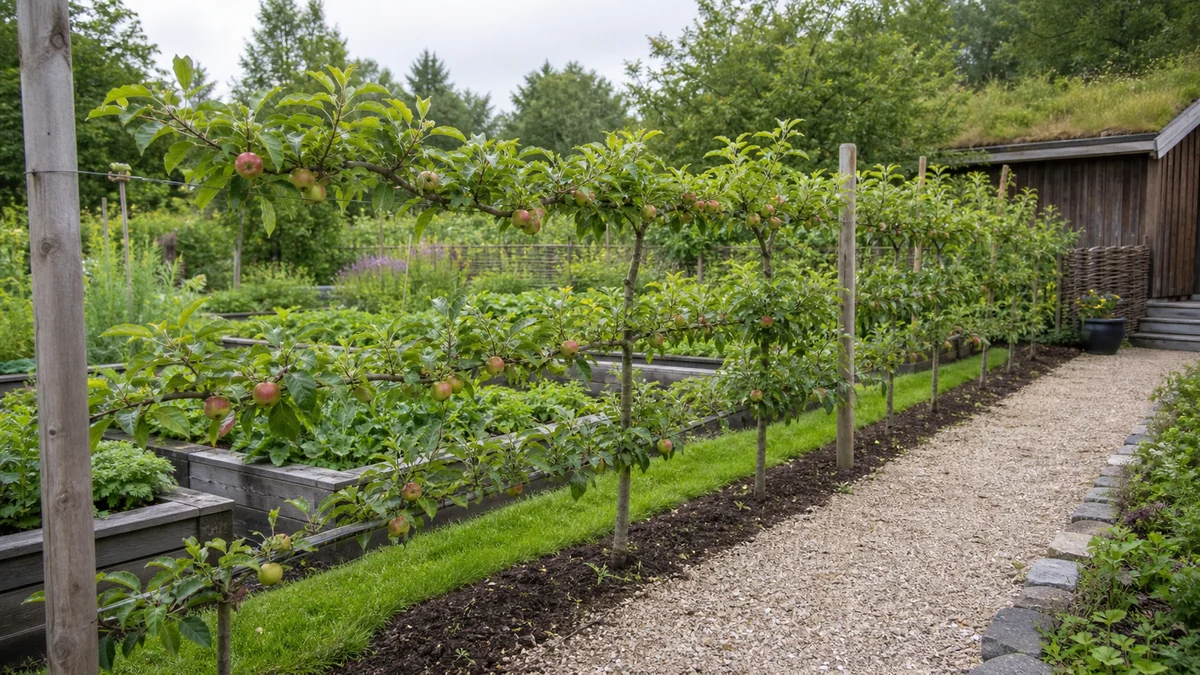
An apple-tree hedge is not made by clipping ordinary apple trees into a green wall. It is an espalier system: selected branches are tied horizontally to permanent wires, usually forming a fruiting screen about 60-180 cm high. Choose dwarfing rootstocks that can be supported, allow roughly 1.5-2.5 m per tree unless the nursery specifies closer spacing, and confirm compatible pollination before digging the first hole.
A trained fruit screen, not a clipped hedge
An espalier earns its space where a conventional apple canopy would be too wide: along a sunny boundary, beside a path or as a low divider around a kitchen garden. Horizontal tiers expose blossom and fruit to light while keeping picking and pruning within reach.
Rootstock controls much of the eventual vigour. A named cultivar grafted onto a dwarfing rootstock can remain compact, but its restricted roots also mean it depends on a stake or trellis throughout its life. Ask the nursery for the rootstock name and recommended spacing rather than relying on the cultivar label alone.
The planting line needs full sun, open air and well-drained soil. Avoid a frost pocket where blossom is repeatedly damaged, and leave enough working room on both sides to tie branches, thin fruit and inspect leaves.
- Decide the finished height and number of horizontal tiers.
- Confirm rootstock vigour and nursery spacing for every tree.
- Choose cultivars that flower together, or verify a nearby apple or crab apple can pollinate them.
Build the support before planting
Use firmly anchored end posts and tensioned horizontal wires capable of carrying mature branches, foliage and a fruit crop in wind. Set the lowest wire for the first tier and add higher wires at the intended branch levels. A weak decorative trellis is difficult to replace after trees are attached.
Plant in autumn or spring when soil is neither frozen nor waterlogged. Keep the graft union clearly above soil level, spread the roots without forcing them into a narrow hole, water thoroughly and tie the trunk to support with a flexible tie. Keep the graft union above soil, check how the rootstock affects tree size, and confirm compatible pollination between cultivars or with a nearby apple or crab apple. Maintain a grass-free area around each young tree so turf does not take its water.
- Anchor posts before roots make access awkward.
- Keep the graft union above the final soil and mulch level.
- Tie the trunk independently from branches being trained to wires.
- Water deeply during dry periods while the root system establishes.
Form each horizontal tier patiently
Select two suitable side-shoot leaders for each horizontal tier and tie them gradually to permanent support while they are still flexible. Tie them first at a gentle angle, lowering them towards horizontal in stages; forcing a stiff shoot flat can split it at the trunk. Keep the central leader growing until it reaches the next wire.
Winter work establishes the framework by choosing leaders and removing misplaced wood. Late-summer pruning shortens new side shoots and helps keep the screen narrow without cutting away the permanent arms. Distinguish the trained framework from temporary shoots before making each cut.
Train each tier through the growing year
- Late winter or early spring: shape the framework after the coldest weather and remove vigorous water sprouts.
- Spring: check blossom overlap between pollinating cultivars and water new trees.
- Early summer: tie flexible shoots to the correct wire and remove vigorous water sprouts.
- Late summer: shorten side shoots while preserving permanent arms and fruiting spurs.
Balance water, pollination and crop load
Young dwarf trees have limited root systems, so check soil moisture during dry weather and water the root zone thoroughly. Renew mulch over moist soil without banking it against trunks. Recheck ties several times a year and loosen any that begin to constrict bark.
Most apple cultivars crop better with pollen from a compatible cultivar flowering at the same time; a nearby crab apple can sometimes provide it. After fruit set, thin crowded clusters so the remaining apples have room and slender branches are not overloaded.
Pruning mistakes that undo the hedge
The common error is treating the row like privet and shearing every surface. That removes fruiting wood, stimulates congested regrowth and erases the branch structure that an espalier needs. Make selective cuts while you can still identify the central leader, horizontal arms, fruiting spurs and upright water shoots.
- Do not bury the graft union or let grass close around young trunks.
- Do not force woody branches horizontal in a single movement.
- Do not remove all short fruiting spurs during summer pruning.
- Do not leave a heavy crop on weak young tiers without thinning.
Choose an espalier only if the annual work fits
An espalier saves width, not labour. It suits a gardener willing to inspect ties, guide young shoots, prune twice in different ways and thin a heavy fruit set. A free-standing tree is more forgiving where regular access cannot be guaranteed.
Before ordering, draw the wire levels, mark each trunk position and list the rootstock and flowering group of every cultivar. That plan exposes spacing or pollination gaps while they are still inexpensive to correct.
FAQ about Apple tree hedge
Can ordinary apple trees be clipped into a hedge?
A useful fruiting hedge is trained as an espalier rather than surface-clipped. Rootstock choice and permanent horizontal branches keep its size and fruiting structure predictable.
How far apart should espalier apples be planted?
About 1.5-2.5 m is a starting range, with closer spacing possible on suitable dwarfing rootstocks. Follow the nursery's recommendation for the named rootstock.
Does an apple hedge need more than one cultivar?
Most apples benefit from a compatible cultivar flowering at the same time. Confirm the flowering groups or whether a nearby apple or crab apple supplies suitable pollen.
When should an espalier apple be pruned?
Use late winter or early spring for formative framework work after the coldest weather, then shorten new side shoots in late summer while retaining permanent arms and fruiting spurs.